Top Carpet Problems that Homeowners Face

Person cleaning a carpet stain. Home carpet faces constant exposure to stains, spills, and other accidents. After enough time has passed, these deleterious effects add up and can harshly decrease your home’s visual aesthetic and overall value. Listed below are the solutions you can take to common carpet issues homeowners encounter and the action you can take to fix them.

Beverage Spills Whether it be fruit juice, wine, or chocolate milk, spills from beverages require immediate action to prevent serious stains. Some people’s first reaction might be to take a cloth and scrub away - but this will just spread it. Instead, using either a damp paper towel or cloth, lightly dab the area so that the liquid is soaked up instead of shoved into the carpet fibers.

That Relentless Smell A golden rule trick to reducing odorous carpet is the application of baking soda. This technique is especially helpful to reduce the odor generated from general grease, oil, pet stains, and dirt from household traffic. First, vacuum the targeted surface areas that smell. Next, sprinkle the baking soda with a hefty coating so that sufficient coverage is met; also, it helps to take a cloth to the baking soda so that it’s ingrained in the carpet’s fibers. After waiting an hour or two, vacuum the area once again.

Surprise Pet Stains & Neglected Food Residue There are some stains that occur when you’re not available to promptly handle them (sometimes the dog just can’t wait). These splotches pose a threat of incurring discoloration, odor, and a serious reduction in the texture’s quality. Dispose of these by arming yourself with a carpet cleaning solution that fits for your carpet’s material; this also goes for pet waste or vomit, which there are powerful solutions specially designed for.

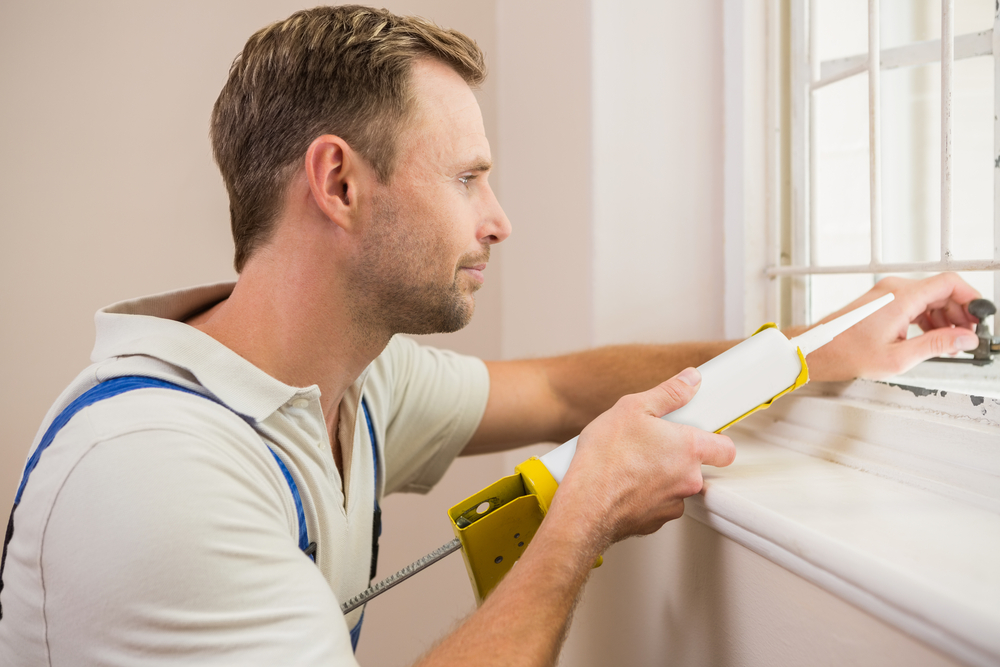
Maintaining a clean carpet is one of the many vital facets of a healthy, aesthetically-pleasing home. With another essential aspect of a home's value being windows, it's important to upholder frequent upkeep and repairs of them; if you have any questions concerning yours, contact Wallside to learn all about the replacement windows we build in our own factory and how we can help install them for you. 

How to Clean Window Tracks in Five Steps

Over time, window tracks build up with dust, insects, and multiple other sources of gunk that can hinder the window's slide performance; it’s important to take notice of this because the cleanliness of the track dictates how smooth and easy a window opens. Read our step-by-step instructions to learn how you can clean your window tracks and prevent future jams. 1. Remove the window sashes. If unsure how to remove sashes for sliding windows, check out our visual guide to get a better idea of how it’s done.

2. Use a dust vacuum to suck up large chunks of grime and pebbles of dirt collected along the frame. These are usually main sources of blockage and prevent fluid openings. Vacuum until all debris is removed; afterward, a brownish black layer of sticky crud should remain.

3. Grab a homemade or store-bought cleaning solution, cleaning rag, and worn-out toothbrush. Make sure to give the corners a thorough wash as these are hot spots for thick accumulations of grime. If the dirt is extremely thick and cannot be sufficiently scrubbed with the utensils listed above, use a q-tip or other tool lying around the house that can adequately reach the hard-to-reach crevices.

4. Arm yourself with a roll of paper towel and warm water to scrape up remaining residue until the surfaces are clean and dry.

5. Ensure a smooth opening by applying a silicone spray lubricant onto a wash rag; thoroughly scrub the track just as you did before. Go slow in order to not touch the silicone lubricant on anything but the slide. Once appropriately applied throughout the slide, re-attach the sashes and the job is done!

If you’re still having trouble sliding your windows even after following the above guidelines, there may be other issues at hand. The area between your window’s sash and jam could be coated with paint (a common occurrence); if this happens to be your situation, you're probably experiencing a window jam

For questions concerning window repair or installation, call or email Wallside Windows to speak to a professional to see how we can help and if it might be time for a window replacement.

Tips to Safely Remove Broken Window Glass

  Shattered window with a blue frame.

Windows break. Whether it be from a mis-aimed baseball throw or a weather-related accident, a broken window is a common household repair. This said, shattered glass can be extremely dangerous and needs to be handled with careful attention. Follow these tips to make your clean-up as safe and efficient as possible.

First things first Before anything, make sure all children and pets are at a safe distance from the broken glass in the areas inside and outside of the broken window.

Wear protective clothing As mentioned earlier, even while being super careful, the tiniest glass fragments can easily penetrate skin tissue or get in someone’s eyes. The best defense against this is to wear:

  • Extra-protection gloves
  • Safety glasses
  • Bulky sweatshirt
  • Durable pants

Note: Avoid slippers, sandals, or thin-sole footwear.

Clean surroundings inside and outside the window Search for scattered shards surrounding the broken window. Gather a broom and dustpan to scrap the jagged remnants; once collected, place them in a sturdy, secure container such as a box and then into the garbage. For glass found on carpet surfaces, use duct tape or a vacuum. Lastly, inspect the rest of the area for shards that may have spread and could possibly injure someone.

How to replace the window After cleaning up the broken pieces around the window’s interior and exterior spaces, you will want to call a replacement window service company . It’s important to be quick about this because the momentary lack of a window poses you at risk for invasive bugs and adverse weather conditions.

Three Problems Installing New Replacement Windows Solves

Man installing new replacement windows Along with serving as the personality of a home's design, home windows offer many practical functions. Listed below are three of the most common household issues that replacement windows solve.

Air Leakages Though there are several factors that can contribute to a draft, many times it is due to window damage such as gaps, weathered frames, and cracked glass. When not handled accordingly, air leakages can lead to huge losses in energy and annoying drafts. The addition of new replacement windows with freshly sealed frames will ensure an air-tight home free of leakages.

High Energy Bill Over the years, a home’s windows can become outdated and lessen in insulation performance. If your energy bill has taken a recent spike, faulty windows may be the culprit—it might be time for new windows. You may want to consider Wallside's vinyl replacement windows, which are designed with the latest insulation technologies  in order to provide maximum energy efficiency that will sustain for years to come.

Stagnant Air Circulation Adding a window into a room—such as a casement or double-hung style that can be cranked open—works wonders against cramped, stuffy rooms. These work best in living spaces where unpleasant smells linger or get trapped. Additionally, areas where work is done like the home office require circulation to promote oxygen and clear-thinking; it’s circumstances such as these that a new replacement window would be a perfect fit.

If you have any questions regarding window installation or repair, give Wallside a call to speak to a professional and see what we can do to help.


Make a Backyard Fire Pit in Six Steps

  Backyard fire pit made of stones.

With summer on the horizon, it’s an opportune time to unwind outdoors with friends and family. What better way to do this than huddled around the warm glow of a fire?

1. Take Necessary Precautions You’d be pretty disappointed if after going through the whole process to build a fire pit, you find that it’s against the law in your area. Check in with the law authorities near you to prevent this and learn about any specific laws in the region that may deem fire pits illegal or dictate specific rules to have one (it’s common for pits to be a specific distance from a home).

2. Claim a Safe Spot Scout out an area a secure distance from your home. Make sure there are no looming tree branches, brush, or outdoor equipment within proximity. Also, keep a safe distance from property lines and fuel tanks.

3. Gather Materials

  • Stones/bricks; avoid using rocks and materials that have been recently exposed to rain or water as these could explode after being heated.
  • Shovel
  • Rake
  • Wheelbarrow
  • Durable work gloves
  • Concrete mix

4. Dig the Base Dig out the general base of the pit roughly five-to-seven inches deep and about three-to-four feet wide, depending on your preference; rake the dirt so that it it is even and flat. Following this, designate the pit's  center and create another, smaller circle within the base’s circumference, which can be marked with spray paint.

5. Stack the Bricks/Stones Stack the bricks (or stones) you have chosen for your fire pit around the inner ring you have created. Assemble these tightly against one another to form the wall surrounding the fire. There should be at least two firmly-stacked layers; visually, the perimeter of the entrenched base should be lined with these bricks as a protective fortress surrounding the inner ring.

6. Add Concrete Mix the concrete by following the specific directions laid out by the brand you have chosen to use. Once the mix is ready to go, add and spread it around the inner ring; allow the concrete to dry as needed. If unfamiliar with handling concrete mix, watch the video below.

[embed]https://youtu.be/ANkPGzAEAHI[/embed] There you have it! By taking the proper safety precautions and following the rules above, your fire pit should be good to go!