Pros and Cons of an Open Floor Plan

Pros and Cons of an Open Floor Plan Like all things related to home design, certain types of floor plans come and go in trends. Right now, open floor plans are a highly desirable home feature. Open floor plans feature fewer walls so rooms naturally blend right into each other. This trend has become so popular that most new construction homes are built with an open floor plan. But many owners of older homes like this trend so much, they’ve had walls removed to create an open floor plan for their home.

Open floor plans can have a huge impact on a home. Not only does it make a dramatic difference in the way your home looks, it can affect the way you use your home. All home design choices have their advantages and disadvantages and open floor plans are no exception. Whether you’re thinking of knocking down some walls to create an open floor plan or are considering buying a home that already has an open floor plan, here are some pros and cons to keep in mind.

Who Can Benefit from Open Floor Plans?

People with all sorts of lifestyles have found benefits in open floor plans. Many parents with young children love open floor plans since they make it easier to keep an eye on the kids. But on the other hand, some people feel like open floor plans are better suited for single people or couples without children since they don’t have to worry about finding ways to hide toys and don’t have to worry about controlling the noise from playing children. If you like to host lots of parties at your house, an open floor plan could improve the traffic flow in your home and allow you to feel more connected to your guests.

Open Floor Plans Pose Decorating and Storage Challenges

When people make the decision to remove a wall to open up their floor plan, they often don’t consider how it will affect their available storage space or possible decorating options. Without walls, there are fewer places to put cabinets and shelving. As a result, you may either have to get rid of some of your belongings, find some creative storage solutions, or add storage elsewhere in the house, such as in the garage or basement, to make up for the storage space you lost. If you like to decorate by hanging pictures or artwork on your walls, the loss of wall space means you may have more limited decorating options. Losing wall space may also make it difficult to find places to put certain pieces of furniture.

With fewer walls in your house, you’ll also need to be very committed to keeping things organized. If your kitchen is visible from the living room, you don’t have the option of just shutting a door to hide a sink full of dirty dishes when a neighbor drops by unexpectedly.

Let There Be Light!

One of the biggest advantages to open floor plans is that they can allow more natural light into a room. When you have more natural light in a room, you won’t have to rely on electric lights as much and your electric bills will go down. If you’re thinking about opening up your floor plan, consider the placement of your vinyl replacement windows, sliding glass doors, and skylights and think about how you can use them to your advantage.

Removing Walls May Be Easier Said Than Done

Knocking down a wall or two to open up your home’s floor plan probably sounds pretty easy, right? It’s actually more complicated (and possibly more expensive) than you might think. You’ll need a professional to come out and check to make sure a wall isn’t load bearing. Load-bearing walls can be removed, but it’s more difficult and, in turn, is more expensive to have done. Walls also often hide plumbing pipes or electrical wiring. If this is the case for you, you’ll also need to get advice from a professional about what can be done about them.

Make Your Home Feel Larger Without Actually Expanding

If your home is starting to feel cramped and crowded, moving to a new house or having an addition built on your home might not be feasible options. Since open floor plans look so much larger and feel more open, taking a few walls down might help you feel a less confined and claustrophobic without having to move or spend a fortune on an addition.

How Noisy Is Your Home?

One thing many people don’t realize about open floor plans is that they can make it more difficult to get some peace and quiet. Since walls help control noise, an open floor plan means the sounds of people talking, kids playing, and the TV will carry much farther than they would in a home with a closed floor plan. If you like a lot of peace and quiet in your home, an open floor plan might not be right for you.

Giving Your Home an Energy Audit

Giving Your Home an Energy Audit You know that improving your home’s energy efficiency is important, but with so many different ways you could go about doing that, it can be hard to know where to begin. Should you add insulation, get vinyl replacement windows, or buy an adjustable thermostat? All of these can help make your home more energy efficient, but are they things you really need to do? If you want to pinpoint the best steps to take to make your home more energy efficient, the best way to figure it out is by giving your home an energy audit.

During a home energy audit, you inspect your home for things like drafts and evaluate your electricity usage. If you take steps to solve the problems found in your energy audit, you may be able to save between 5% and 30% on your energy bills.

One of the best ways to start your energy audit is by looking for drafts or air leaks. These most commonly occur in areas where openings are cut into walls or ceilings, such as around exterior doors, windows, electrical outlets, openings where phone or cable wiring enter the house, and skylights. Drafts also can happen around baseboards, mail slots in doors, and where a chimney meets the side of your house. To find these drafts, look for things like visible gaps and worn caulking or weatherstripping. You could also try (carefully) moving a lit candle along areas where drafts commonly form. If you see the flame flicker, you know you’ll have found a draft. Ideally, this should be done on a cool, windy day to make any existing drafts more evident. Things like worn caulk or weatherstripping can easily be fixed, but if your windows are simply old and not very energy efficient by nature, completely replacing them may be your best bet for bigger energy savings.

Getting an idea of how much energy is being used by your appliances, electronics, and lighting is a very important part of an energy audit. But looking at your energy bills only shows you how much energy you used in total, not how much each specific item used, which makes it difficult to see exactly where you can make improvements. To help you get an idea of how much energy some common household items use, energy.gov has an energy usage calculator that may be useful. Some appliances have information about energy usage printed somewhere on the product. But if you aren’t able to find an exact number about how much energy something uses, getting an electricity usage monitor from a hardware store can help you figure it out.

Checking your home for air leaks and evaluating your energy usage are excellent steps to take, but if you want a more extensive inspection, you might want to hire a professional to do an energy audit for you. A professional energy auditor will come to your house with all sorts of specialized tools that will allow them to perform a more thorough inspection than the average person is able to do on their own.

During a professional energy audit, the auditor will come to your house equipped with things like infrared cameras and several different types of gauges to find sources of energy loss that you may have missed. A professional energy auditor will also be able to perform a blower door test, which lowers the interior air pressure in your home and makes it easier for the auditor to figure out where air escapes through. They’ll also check your home’s insulation to make sure you have enough. In addition to their thorough room-by-room inspection, a professional energy auditor will also ask to see your recent energy bills and ask you questions about your home in general to help them get a better understanding of your home and its energy usage patterns.

Add Color to Your Yard With These Fall Flowers

Add Color to Your Yard With These Fall Flowers If you enjoy working in the yard, the end of summer can feel almost anticlimactic. After spending so much of your spring and summer planning, planting, and maintaining your garden, it can be a let down to see the peak gardening season come to an end. But not all flowers wither and fade away after Labor Day or when the leaves start to change colors. In fact, many plants and flowers thrive in fall weather conditions and don’t start to bloom until later in the summer. Here are just a few plants that can keep your garden looking beautiful all through fall.

Chrysanthemum

Chrysanthemums are easily one of the most quintessential fall flowers. They come in many different colors, but the varieties that have vibrant yellow, bronze, red, or orange coloring look spectacular with all the fall color. If you live in an apartment or don’t have a large yard to work in, chrysanthemums can work just as well in a container like a window box as they do planted in the ground. If planted early enough in the year, chrysanthemums will have enough time for roots to gain strength to help them survive the cold weather and come back next year.

Aster

Pinks, blues, and purples may not be traditional fall colors, but these are some of the colors of aster flowers and they don’t start coming into full bloom until late August, bringing a lovely touch of color to gardens late in the season. Aster is a very versatile flower and looks great when planted next to a wide variety of other plants. Another reason why many gardeners love aster is because they’re very attractive to bees, butterflies, and other pollinators.

Perennial Sunflower

The perennial sunflower doesn’t grow as tall or as large as regular sunflowers, but they do stand out during the fall. Perennial sunflowers look more like daisies than they do regular sunflowers, but they still have those bright yellow petals which looks great during the fall months.

Sedum

Sedum is frequently called “Autumn Joy” for very good reasons. It’s a plant that can easily survive all year long, but it doesn’t start to bloom until late summer or early fall. It’s an excellent plant to use as edging and also be used in planting containers. Sedum typically has a pink or burgundy color that deepens as the blooms mature, providing an excellent pop of color. Best of all, sedum is an extremely low maintenance plant that can grow in lots of different environments.

Marigold

Marigolds aren’t as hardy as many other fall flowers and plants, but they do come in the classic fall colors, which still makes them a popular choice for fall gardens. They tend to do well in the types of soil conditions that come later in the summer and early in fall. If you’re looking to add some marigolds to your garden, you may be able to get better prices on them later in the year since they are annuals and nurseries are looking to sell as many remaining annuals while they still can still be enjoyed.

Toad Lily

For a more unusual type of fall flower, you may want to look for toad lilies.Its petals have a speckled appearance that helps it stand out from many other types of fall flowers. These flowers grow well in shaded areas and may look delicate, but they can handle the sudden drops in temperature that often happen during the fall months.

Avoid These Common Curtain Mistakes

Avoid These Common Curtain Mistakes Curtains are a wonderful addition to your vinyl replacement windows. They make a decorative statement, add privacy to a room when you need it, and the right types of curtains can even help improve energy efficiency. Curtains are fairly simple household items, but choosing the right ones and hanging them up correctly can be surprisingly complicated. Many homeowners have a hard time finding the right ones and getting them placed just right.

Choosing Curtains Last

When you’re planning to redecorate a room, it can be easy to make choosing the right wall color your top priority. But since paint can be purchased in any color you can imagine, it’s much easier to choose your curtains first and plan your paint colors around them. Many homeowners make the mistake of making curtains one of the last things they buy for a room, thinking they’ll easily be able to find curtains to go with their decor, only to realize it’s not quite as easy as it sounds.

Overlooking Your Curtain Rod

Since curtains are such a large focal point of a room, it can be easy to put all your energy into choosing the right curtains and make the curtain rod an afterthought. However, your curtain rod is very important. The placement, size, and type of curtain rod you use will all make a difference in how your curtains look. When you’re looking for a curtain rod, consider the type of curtain you have. For example, if you have heavier curtains, you’ll need a curtain rod that’s sturdy enough to support the weight of them. Or if you have curtains with grommets at the top, you’ll need a rod that will work well with those.

Unless you’re hanging a valance, curtains should be hung closer to the ceiling than to the top of your window frame. Many designers recommend that curtain rods be placed at about two-thirds of the height between the top of the window and the ceiling. This helps make ceilings seem taller, which can be particularly nice if you’re dealing with a rather small room.

You’ll also want to consider the width of your curtain rod. You curtain rod shouldn’t be the exact width of your window, it should be about 10 to 12 inches wider. That way, your windows will look larger and your curtains won’t block your view when they’re opened.

Measure Carefully

One of the most common mistakes people make when choosing curtains is that they only measure the size of the window the curtain will be covering. While this is certainly something you’ll want to be aware of, the curtain will be covering more than just the area of the window and you’ll need to account for that. Curtains that are too short look awkward and ones that are too long can be a magnet for dirt and pet hair. If they’re too wide, they’ll block your window when pushed to the sides and they’ll look proportionately strange if they aren’t wide enough.

To measure your window for curtains, measure the width of your window and double that number. If you want a little extra fabric to work with, you may want to multiply the width of your window by 2.5 instead. As for length, don’t forget to account for the height of your curtain rod! If your curtains are the right size and your curtain rod is placed correctly, your curtains should come no more than an inch above the floor.

Get Rid of Wrinkles

Once you’ve finally found some curtains you love, it can be tempting to hang them up as soon as you get them home. But brand new curtains will inevitably have some wrinkles when they’re straight out of the package. Don’t just expect the wrinkles to fall after being hung for a while. Unless your curtains have an intentionally crinkled texture to them, iron or steam your curtains first to get rid of the wrinkles. It may not be a particularly fun chore, but it will help your room look much neater in the end. In some cases, wrinkles might interfere with the way your curtains hang.

Taking Care of Your Yard in the Fall

Taking Care of Your Yard in the Fall Now that summer is winding down, you might think that it’s time to cut back on the yard work. On the contrary, the fall months are actually a crucial time of year when it comes to lawn care. The things you do to take care of your lawn now can keep your lawn healthy throughout the winter and help get it ready to look amazing next year.

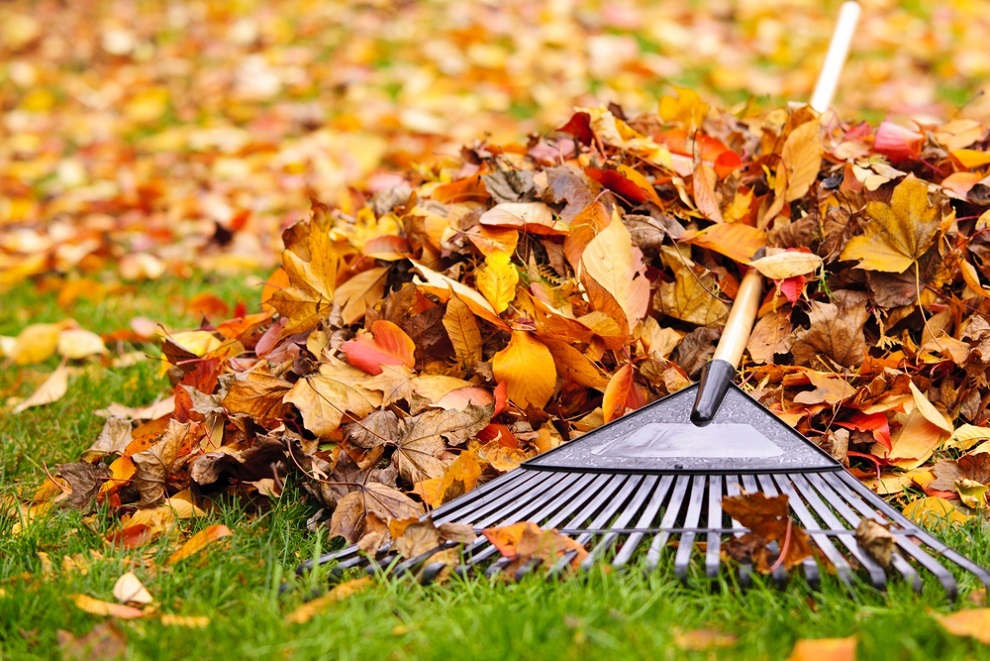
Once leaves start falling, it’s very important that they be raked up regularly. Raking isn’t always a fun chore, especially if you have a large yard full of trees, but getting rid of fallen leaves is essential to keeping your lawn healthy. Fallen leaves will prevent sunlight from getting to the grass underneath and will trap the moisture in that comes from dew and rainfall. If that moisture is left trapped underneath the leaves for too long, it can cause problems like mold and fungus growth.

If your lawn has some spots where the grass is looking a little thin or the soil has become compacted, perhaps a result of spending lots of time in the yard with your family over the summer, now is an excellent time to act. Fall weather is perfect for filling in bare spots around your lawn, whether it’s with seed or sod. Since there tends to be plenty of rainfall and more moderate temperatures, these conditions tend to encourage growth. And if your soil has become compacted, aerating your lawn will help oxygen and other nutrients reach the roots of your grass.

After aerating your lawn, you may want to have your lawn fertilized. Many lawn care experts believe that fall is actually the best time of year to have your lawn fertilized since the roots of your grass are still growing at very strongly, even if the visible grass blades are not growing as quickly anymore. By fertilizing your lawn in the middle or late fall, you’re giving it the extra nutrients it needs to survive the cold winter and come back strongly in the spring.

Don’t be too eager to put away the lawn mower or the sprinkler just yet! If grass is allowed to grow too long, it can get matted down under the weight of fallen leaves and snow, which is another thing that can lead to mold growth on your lawn. But cutting your lawn too short isn’t necessarily healthy for your lawn, either. During the fall months, you want to keep your grass about 3 inches long. Continue mowing your lawn until the first major frost of the year.

As for watering your lawn, how often you should do that depends on how much rain you’re getting. If you’re getting at least an inch of rainfall every week, you don’t need to do anything more. But if you’re dealing with an unusually warm, dry fall, your sprinklers will need to make up for the lack of rain, so keep them around until around Halloween.

When you’re out taking care of your lawn, don’t forget the other things in your yard. Trees and bushes often need to be trimmed back to prevent them from being damaged by snow and ice over the winter. Be sure to go through your garden and get rid of the annual plants that have lived their life and cut back the your perennials so they’ll be ready to grow back next year. And once it’s time to retire the lawn mower and the sprinklers for the year, don’t forget to have them winterized. Make sure you turn off the water going to your outdoor faucets, drain the remaining water from them, and put the hoses away.