Choosing the Right Flooring for Your Kitchen

Choosing the Right Flooring for Your Kitchen No matter what room you’re working with, choosing the right type of flooring is a very important decision. But if you’re thinking of replacing the flooring in your kitchen, there are a lot of special factors that come into play. Kitchens are typically one of the most heavily trafficked rooms in a home and the floors are very likely to be spilled on or have pots and pans dropped on them, so you need to find something that’s both comfortable to stand on, but is also very durable. And, of course, you’ll also want to find an option that fits in your budget, but still looks nice. There are lots of different types of flooring out there, so which ones work best for kitchens?

For a flooring option that’s affordable, attractive, and durable, ceramic tiles are a great choice. Ceramic tile has a very nice, classic look and not only is it pretty budget friendly, you might even be able to install it yourself if you’re a big DIY-er. It can be cleaned easily and withstand lots of activity, but the grout will need to be sealed every now and then to prevent staining. Unfortunately, ceramic tile can be cold and uncomfortable to stand on for significant amounts of time, so you’ll want to have mats to stand on.

Vinyl and linoleum are other very popular and affordable choices. Both vinyl and linoleum are extremely versatile and come in a very wide variety of colors and finishes. Although many people think vinyl and linoleum are the same things, they are two different materials. Vinyl is the more affordable option of the two and homeowners can install it themselves. Linoleum is made of natural substances, so it’s a great option if you’re looking for an eco-friendly flooring material. However, linoleum is not as easy to work with as vinyl, so you’ll most likely need to hire a professional to install it. Vinyl tends to be a little more durable than linoleum, but many people prefer the look of linoleum.

Many homeowners absolutely love the look of hardwood floors and they can absolutely be used in the kitchen if you want. However, it’s more expensive and a little more high maintenance than many other types of flooring. It can also be scratched and prone to staining if you don’t clean up spills fast enough. If you love the look of hardwood floors, engineered wood and laminate flooring offer the look of natural wood, but are less expensive, are easier to care for, and can be installed without the help of a professional. Just be aware that laminate and engineered wood can dent easily.

A newer trend for kitchen flooring has been to use cork. Since it’s a softer material, it’s very comfortable to stand on and if you drop a plate or glass onto the floor, it’s less likely it will break. Unlike other types of flooring, if the floor gets a little bit of damage, minor bits of damage can actually heal themselves. Cork floors do need a little bit of maintenance, though. In addition to needing to be routinely swept and vacuumed, they’ll also need to be resealed every now and then.

Many homeowners also like the look of concrete or natural stone floors in their kitchens. Natural stone floors can be beautiful and concrete floors are extremely durable. As long as a concrete floor is sealed to resist stains, you really won’t have much to worry about in terms of maintenance. However, stone and concrete are both some of the most expensive kitchen flooring options. Stone floors can be very high maintenance and some types of stone can be damaged easier than others. Both concrete and natural stone floors can be difficult to install, so you’ll need to hire someone to install them for you.

Important Questions You Should Always Ask Your Contractor

Important Questions You Should Always Ask Your Contractor You don’t have to be a long-time homeowner to know that home renovations and other improvements don’t come cheap. If you need to hire a professional contractor for a job, you’re going to have to pay quite a bit for their expertise. All too often, homeowners are eager to save money and end up making the mistake of hiring the contractor who quotes the lowest price without asking many questions. Unfortunately, these homeowners often end up regretting that decision. If they had asked more questions up front, they may have been spared a lot of frustration.

Depending on the size of the job, you might have spent years saving up the money you need to pay for it. When you’re finally able to have the improvement made, don’t make the mistake of hiring the wrong contractor. Before you hire someone to do a job, be sure to talk to a few different contractors first and never be afraid to ask lots of questions. A good contractor will understand how important this project is to you and won’t be bothered at all by answering them. Here are just a few of the most important ones you should always ask before signing on the dotted line.

Are You Licensed and Insured?

Out of all the things you could ask, this is definitely one of the most important. Hiring an unlicensed contractor might save you a little money upfront, but it can cost you a lot more in the long run if they don’t do the job correctly. A good contractor should also have the proper insurance to cover the costs if one of his subcontractors is injured on the job or if there’s an accident that damages your home. And, of course, don’t forget to ask to see proof that they’re licensed and insured. You may even want to do a little research yourself to make sure they really are licensed.

How Long Have You Been Doing Business Locally?

The longer a business has been doing business in a certain area, the more likely it is they’ll have a good reputation they’ll be dedicated to upholding. They’ll also have had plenty of time to build good relationships with local material suppliers and people they hire as sub-contractors. A contractor who works locally will also be familiar with all the local building codes.

Will You Be On Site During the Job?

In many cases, when you hire a contractor, the person you talk to might not necessarily be the person who will actually be doing the work on your house. The person you talk to will at least be in charge of overseeing the people who actually do the labor on your job. If the contractor you talk to has a lot of other jobs going on at the same time, they might not be able to spend all of their time at your house. At the very least, they should be able to come by and check on the progress at least once a day. If they can’t be there themselves, ask who will be there.

Are Permits Required and Will You Pull Them?

Not all home improvement jobs require building permits. But if they’re needed for your project, they can be pulled by either you or the contractor.  A good, trustworthy contractor should gladly offer to pull the permits for you. When a contractor tries to get permits, they must be able to show proof of being licensed and insured. Homeowners don’t need to be licensed or insured to get permits to work on their own home. If a contractor tries to pressure you into getting the permits for them, it might be a sign that they aren’t actually licensed or insured.

When Will You Be Able to Start Working and How Long Will it Take?

Good contractors are often very busy and might not be able to start on your job right away. If you need to have a project completed by a certain date, a contractor’s schedule might not be a good fit for you. While there are many reasons why a job might end up taking a little longer than expected, but a reliable contractor should give you a pretty clear timeline of how long they expect the project to take.

Could You Give Me An Itemized Bid?

When many people talk to contractors about getting an estimate, they typically mostly want to be quoted an exact price. But it’s very smart to ask for an itemized list of everything that’s included in that price. If a contractor gives you a quote that’s a bit less than another contractor’s, there’s a good chance that the lower price doesn’t include some aspect of the job, like trash removal. By asking for this, you can avoid some unwelcome surprises later on.

How to Paint a Window So it Doesn’t Get Stuck Shut

How to Paint a Window So it Doesn’t Get Stuck Shut Windows can get stuck shut for a multitude of reasons. Sometimes it’s because a house’s foundation has shifted, making it difficult, if not impossible, for a window to move on its track anymore. Other times, a wood window might swell on a humid day, making it difficult to open. But in many cases, windows end up getting stuck shut because they weren’t painted properly and when the paint dried, the paint effectively sealed the window shut.

The nice thing about vinyl replacement windows is that they’re so low maintenance; there’s no need to worry about painting the frames on them. But other types of windows, particularly wood windows, need a little more maintenance. Wood windows need to be painted or stained every now and then to prevent being damaged by water. Painting windows can be a challenge, but it’s very important to take the time to do it right so your window doesn’t get stuck shut. If you’ve ever tried opening a window that’s been painted shut, you know how difficult they can be to open again. Here’s what you can do avoid this problem!

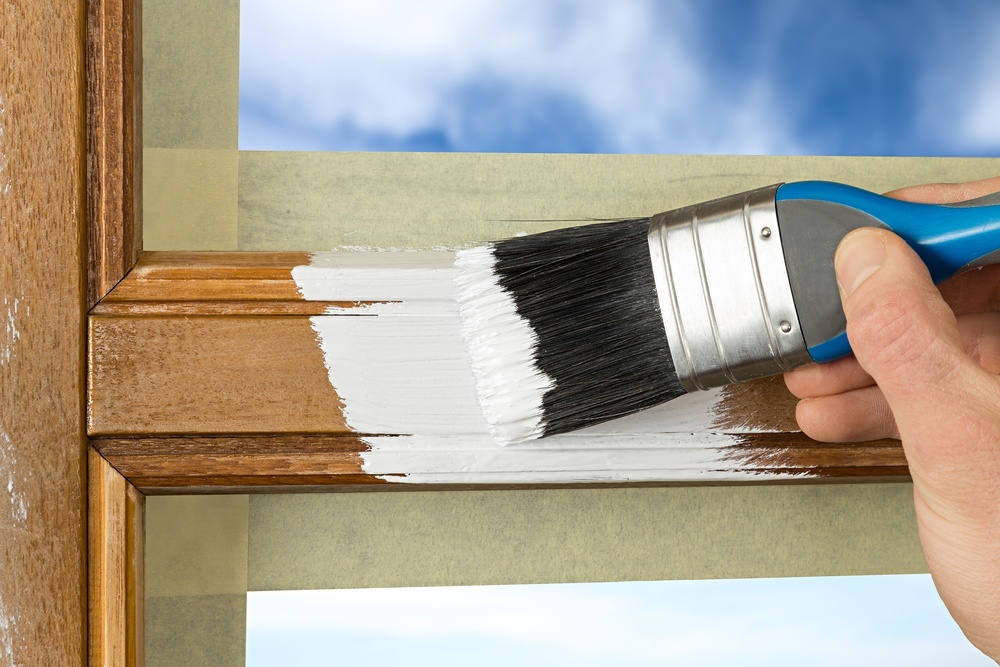
When painting a window’s sash, be very careful. This is where many people end up accidentally painting their windows shut. The sash is the movable part of the window and consists of the window pane’s horizontal and vertical frames. If you have double-hung windows, raise the lower sash and lower the upper sash. If you have single-hung windows, you’ll only have to open the operable pane. They don’t necessarily have to be wide open, but they need to be open just enough so that you’re able to reach the exposed part of the sash with your paintbrush.

Once you’re done painting the exposed part of the sash, move the panes of your window a little bit, but don’t shut them all the way. Be sure to leave the windows open a little bit while the paint dries. If you shut them while the paint hasn’t dried, the paint will basically glue the window shut as it dries. It’s important to move your window a little bit after you’re doing painting so that any paint that may have seeped into the cracks won’t have a chance to dry while your window is in one place. Once the sashes have been moved, paint the rest of your sash.

While your windows are open, go ahead and paint your window’s casing and sills. Give the sills time to dry before you shut the window again. After you’re done painting, be sure to open your window sashes at least once a day for a week to make sure it doesn’t get stuck in place.

If you’ve tried your best to avoid painting your windows shut, but your newly-painted window still gets stuck, there are ways to fix it. Try sliding something like a putty knife, utility knife, or a paint zipper along areas where paint may be forming a seal.

Adding Light to Your Home With Skylights

Adding Light to Your Home With Skylights It’s no secret that windows can make a dramatic difference in the way your room looks. If you have a room full of old windows, new vinyl replacement windows can give the room an entirely new look. And, of course, the amount of light they provide can make a world of difference. But if you have a room that just doesn’t get as much natural light as you’d like, you might have to take other measures beyond replacing your windows to get the results you want.

When you’re dealing with a room that doesn’t have windows, is located in a place that just doesn’t get much natural sunlight, or has smaller windows, one option you might want to consider is a skylight. Changing your home’s lighting systems is another option, but skylights tend to be a popular choice since many people like the feeling of being more connected with the outside world.

Although many homeowners love them, skylights have kind of gotten a bad reputation over the years for being leaky and poorly insulated. But skylights have become better constructed over time. As long as they’re installed correctly and flashed properly, you shouldn’t have to worry about your skylight leaking. Energy efficient skylight options are also available to help cut down on potential heat and other energy losses.

One of the main reasons homeowners are interested in skylights is because they see them as a way to help cut down on their energy bills. Since skylights let more natural sunlight in, homeowners see skylights as a way to cut down on how much they use electrical lights. Some people feel like they could even cut down on their heating bills since the extra sunlight will help make their home feel warmer. If these are the sorts of things you’re looking to do, be sure to look for skylights with low-e coatings, multiple panes, and low conductivity frames. Also, be sure to talk to your contractor about making sure your skylight would be placed to allow for optimal light and solar heat.

If adding skylights seems like they’d be too expensive for you, another option you might want to look into is solar tubes. Solar tubes provide many of the same benefits of skylights, but are considerably less expensive and easier to install than skylights.

Whether you choose skylights or solar tubes, they can help make your home more enjoyable all year long. During the cold winter months, they can help you feel like you’re getting more exposure to natural daylight, even when the days are shorter. They can also make smaller rooms feel more open. Not to mention how nice it can be to look up and admire a beautiful night sky without having to actually leave the house!

Tips for Planning the Perfect Patio

Tips for Planning the Perfect Patio What better way to spend a nice summer day than by spending it outside on your beautiful patio? Whether you want a place to entertain friends for a summer cookout or just a quiet place to relax with a nice book and a cool drink, a patio is the perfect place to be. If your home doesn’t already have a patio, adding one to your yard is always an option.

Patios tend to require less maintenance in the long run than decks. No matter which type of patio paver you decide to use, you’re not going to have to worry about things like wood rot or having to stain your pavers. And since patios are built into the ground and aren’t physically attached to a home the way decks are, you might not even need to get a building permit to build your patio. (Just be sure to call your city hall to make sure first. Specific ordinances can vary from city to city.) In many cases, patios can be the sort of project you can do yourself, although you can always hire a professional if you want.

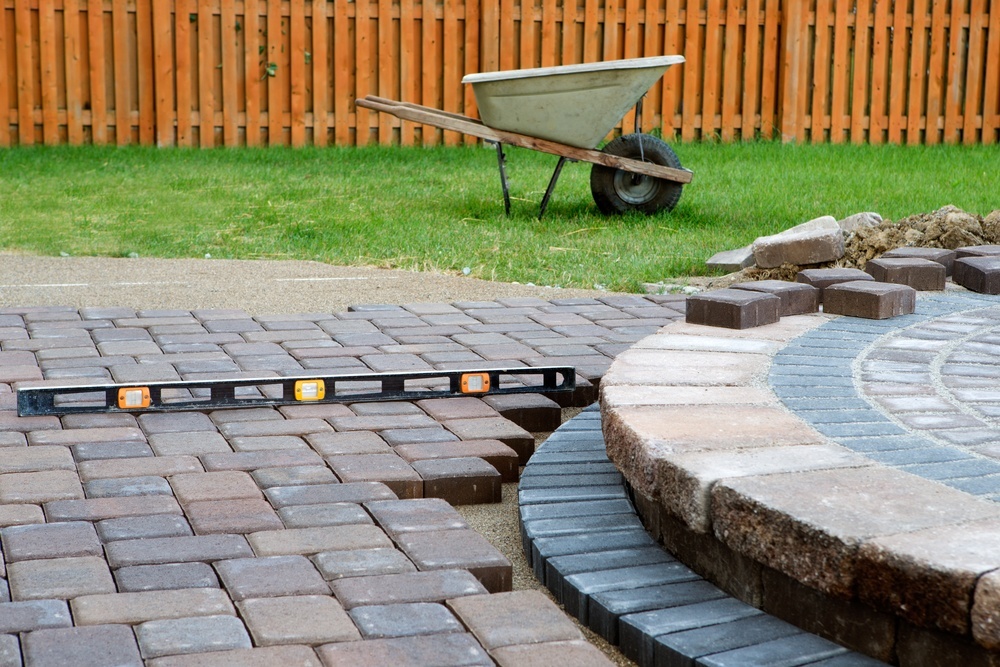
The first step to planning your new patio is to measure out exactly where you want it to be. Better yet, you might even want to take some string and use it to outline where you want it to be. Remember, patios don’t necessarily have to be square or rectangular in shape; circular patios are also very popular. Once you’ve measured out how big you want it to be, calculate the square footage and start figuring out which type of patio pavers you want to use.

Patio pavers come in many different varieties. Brick and concrete pavers are very popular options. They’re durable and come in many different shapes, colors, and finishes and are pretty easy to install. Flagstone and slate are other common choices. If you’re planning a specific pattern for your pavers, you may need to cut some pavers to make them fit, which may require renting a special saw that can cut stone or masonry. Remember, you don’t necessarily have to be limited to one type of paver; many beautiful patios use more than one type of paver. You may even be able to get a good deal on pavers if you live near a stone quarry or know someone who has some stone or brick left over after building a patio of their own.

The cost of pavers aren’t the only thing you’ll need to plan for. In addition to your pavers, you’ll also need some gravel and sand to put down underneath the pavers. You may also want to put down some landscaping cloth if you want to prevent weeds from coming up and growing between your pavers. Laying down a concrete slab is another option for your base, but hiring a professional might be the best choice if you go that route. You’ll also need some sand to fill in the gaps between pavers.

Before you start digging to lay down your patio pavers, contact your utility companies to come out and mark where any underground lines are located. You definitely don’t want to run into any problems by accidentally hitting a utility line.

Another important thing to remember is that you’ll need to build your patio so that it’s sloped just enough to allow water to drain away from your house. Although your patio should be relatively level, elevation should drop just a quarter of an inch for every two feet of distance.

By keeping these tips in mind you’ll be well on your way to having a lovely patio to spend your summers on for years to come!