Blog

Taking Care of Your Window Screens

Taking Care of Your Window Screens Now that winter is over, it’s time to start opening those vinyl replacement windows to let some fresh air in. Washing your windows may be part of your spring cleaning routine, but while you’re cleaning the panes of your windows, don’t forget about your window’s screens. Now that your windows are going to be open a lot more, the last thing you’ll want is to be looking at are dirty or damaged screens. If you’ve left the screens on your windows all winter long or didn’t clean your screens after you took them down last year, now would be a very good time to clean them and keep them and make sure they’re still in good shape.

To clean your screens, start by removing them from the window if they haven’t already been removed. If your vacuum cleaner has a soft brush attachment, it can be a very helpful tool to get rid of a lot of the dirt that has accumulated on your window’s screens. Just be very careful to not put too much pressure on the window screen or you could damage it.

If your window screens are particularly dirty, you might need to take them outside so they can be more thoroughly cleaned. All you need to make those window screens look as good as new again is some dish soap and water, although some people like to use white vinegar instead of dish soap. Before you start cleaning with your screens, you might want to spray them with a hose to get rid of loose dirt and to make the screens easier to clean. Use a soft cloth or a sponge to gently apply your soap and water or soap and vinegar cleaning solution. Once you’re done, rinse the screens off with your garden hose. If your screens are extremely dirty, you may need to use something like a toothbrush to make sure you get all the dirt.

Once your window screens are clean, place them in an area where they can be propped up to dry without being damaged, like in a basement, garage, or an out-of-the-way spot outside your home.

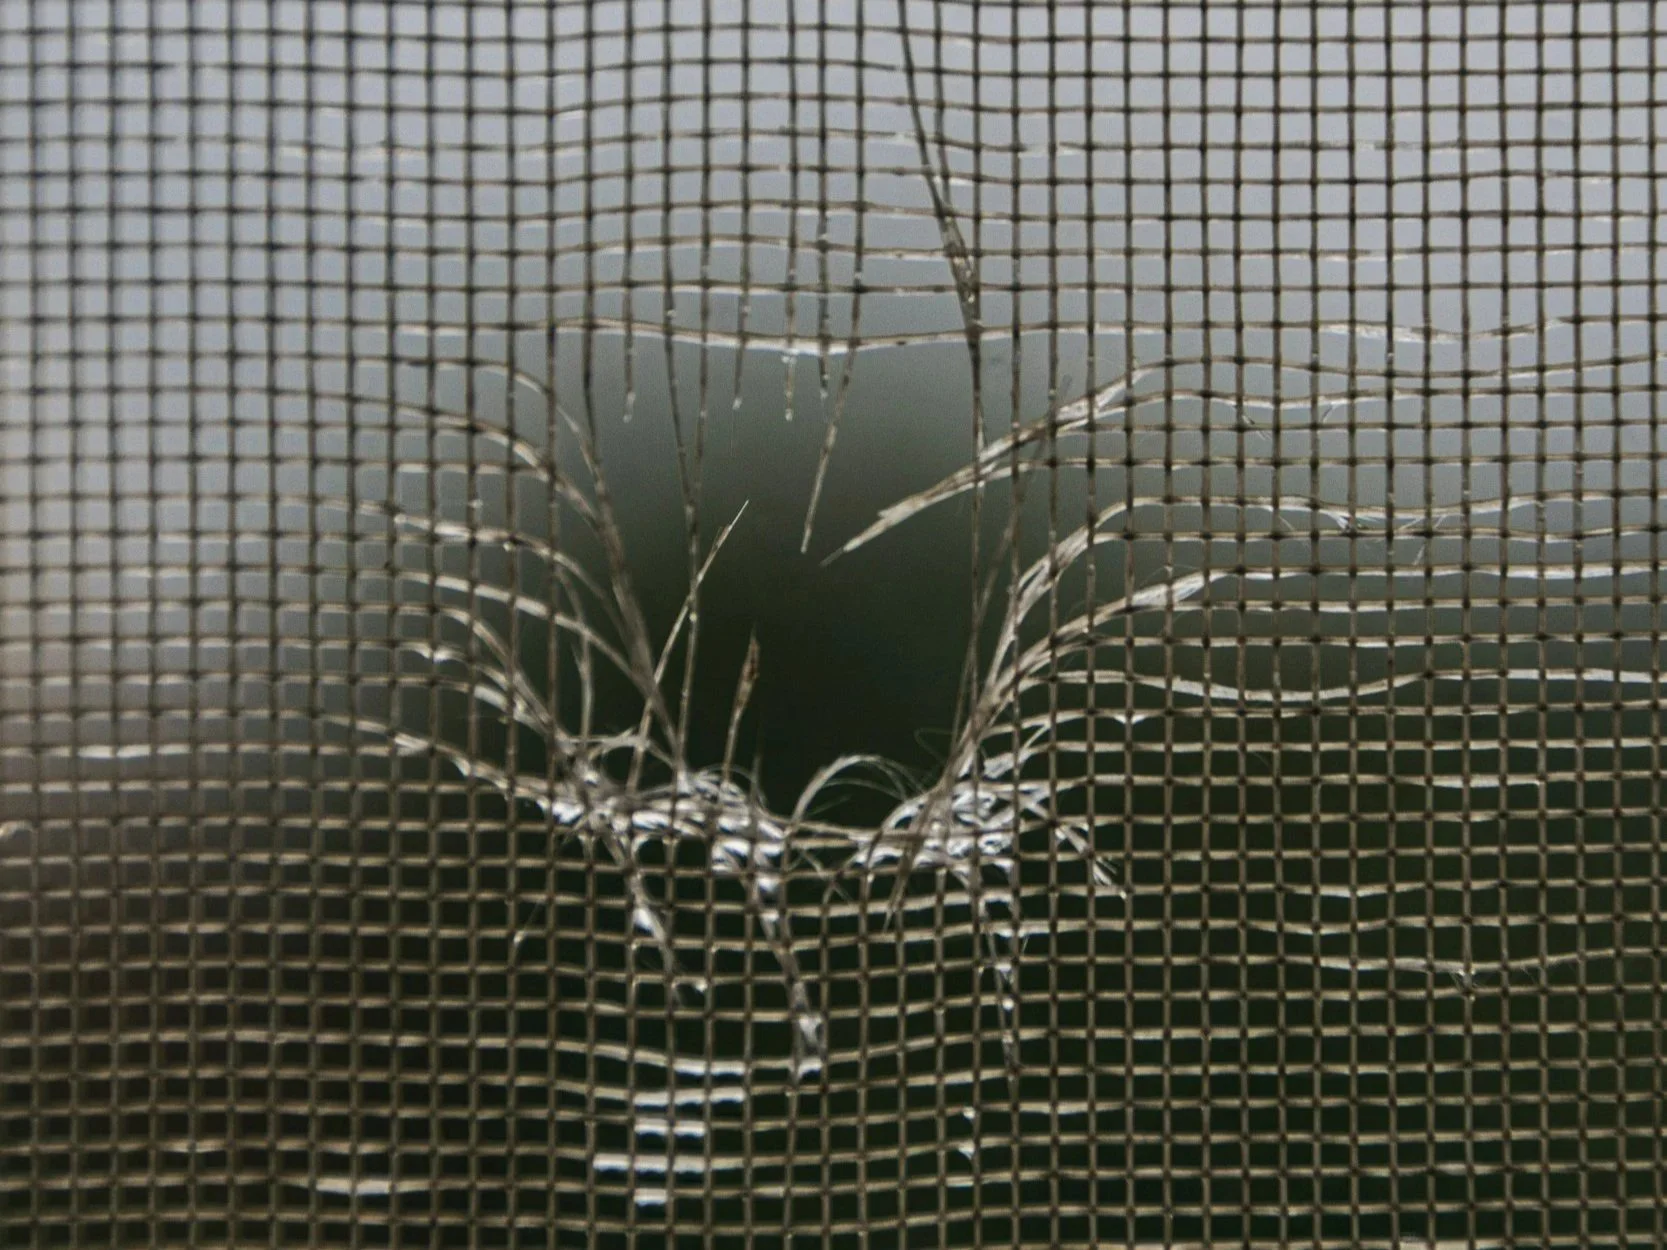
Window screens can be rather delicate, so it’s very common for them to be damaged while in use, while being cleaned, or if they were mishandled while in storage. If this happens, don’t worry -- you probably won’t have to buy a completely new screen. For small tears, you should be able to get a screen repair kit from your local hardware store. With a larger hole or tear, you might want to try getting a piece of mesh just slightly larger than the hole/tear and using a fast-drying glue to attach it to the screen.

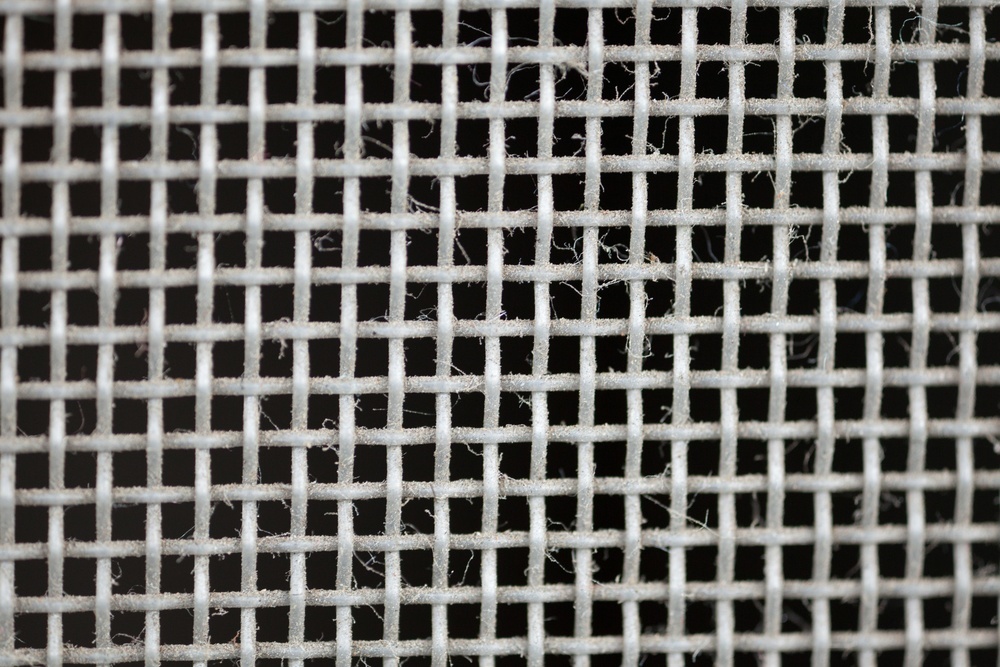
If a screen has been badly damaged or torn, but the frame itself is still fine, you could simply get some new screening material and replace the screen for just a few dollars. All you need to do is get some new screening material, some spline (the plastic cording that holds the screening material in place), a rolling tool for the spline, and some scissors or a utility knife. First, remove the existing spline and screening material and cut your new screening material to a size large enough to fit the window, plus a couple of extra inches on all sides. Lay the new screen over the frame so that the screen overlaps with the frame a little bit. Pull the screening material taut (you may need to use clamps or have someone else hold the screen for you to do this) and start applying the new spline, using the spline rolling tool to push it into the channel around the frame. Once you’ve done that, use your scissors or utility knife to trim the excess screen around the edges and you’ll be all set!

Keeping Your Home Cool Wihtout Using Your Air Conditioner

Keeping Your Home Cool Wihtout Using Your Air Conditioner While it might seem like you were just trying to find ways to keep your home warm without turning up the thermostat, the hot days of summer are already just around the corner and it’s time to start thinking about how you could keep your home cool without spending to do just that!

Become a Fan of Fans

Ceiling fans don’t work by actually lowering the temperature of a room, but they help the air in a room circulate in a way that will help you feel more comfortable. When the weather is warmer, make sure your ceiling fan is set to rotate counterclockwise and that you run it at a higher speed. This will help direct cool air down where you’ll be able to feel it. Box fans placed in windows can also help direct heat out of your house.

Install Awnings on Windows

If you have windows that get a lot of direct sunlight, installing awnings on them is an extremely effective way to significantly cut down on the amount of heat that comes in through them. By installing awnings on windows that get the most sunlight can cut down on the amount of heat generated by the sun that comes in through those windows by up to 77%.

The cost of installing an awning will depend on things like how large of an awning you need, what material you want the awning to be made of, and how many windows you want to have them installed over. But considering how much heat they can prevent from getting into your home, awnings could absolutely be worth considering.

Be Careful About Opening Windows

When it’s hot out and you don’t want to turn on the air conditioner, it’s tempting to go ahead and open all the windows in the house. But on a very hot day, this can only make your home warmer, not cooler. Try to only open your windows when it’s cooler outside than it is inside your house, such as during the evening and early in the morning before the sun has a chance to heat things up too much. When you do open your windows, try to only open the ones that will allow a nice breeze into the house.

Although it can be tempting to open your curtains and blinds open during the day to let some sun in, if you really want to keep your home cool, it’s best to keep them closed during the warmest parts of the day. The type of window treatments you have on your windows can also help to keep your home cooler. Medium-colored curtains that are lined with a white, plastic material will help reflect the heat from the sun back out the window and cut down on heat gains by up to 33%. Reflective blinds can help cut down on solar heat gains by as much as 45%.

Check Your Windows and Doors

When you winterize your home, you typically do so with the purpose of keeping heat in. But many of the same things you do to keep your home warm in the winter will also help keep your home cool in the summer. One of those things is making sure there aren’t any drafts around your doors and windows. If it’s been a while since you last checked for drafts around your doors and windows, now would be a good time to do so since drafty doors and windows are some of the key ways cool air can escape from your home. Seal up any worn caulk and make sure your weatherstripping isn’t worn down. If your doors and windows are getting old, replacing them with a new steel door or vinyl replacement windows could help make your home more energy efficient and more comfortable all year round.

Watch Your Electricity Usage

Since many things powered by electricity generate heat, being mindful of how you use them is one way to help keep your home a bit cooler. Even if something is powered down or in standby mode, they are probably still consuming some amount of electricity and generating some heat. If you have a room full of things that are often powered down, but aren’t used all the time, like a TV, DVD player, cable box, computer, or video game system, plugging all of those things into a power strip and turning off the power strip when you’re not actually using any of them is an easy way to make sure they aren’t consuming any energy when you don’t want them to be. Even energy efficient light bulbs can still generate heat, so make sure you turn lights off when you’re not in the room.

Since many appliances have the intended purpose of generating heat, like your stove, dryer, and dishwasher, it’s best to use them as little as possible during the hottest parts of the day. If you have room in your backyard, you might want to hang a clothesline to let your clothes air dry. Not to mention, grilling can be a fun alternative to using the stove!

These are just a few very easy ways to keep your home cool during the summer without having to make too much of an effort. If you want to take things to the next level, you could also look into having more insulation installed to your home or planting more trees in the yard. Having mature trees in your yard on the side of your home that gets the most sunlight can help provide shade for your home and naturally reduce your cooling bills.

Wallpaper is Making a Comeback!

Wallpaper is Making a Comeback Decades ago, wallpaper was a very popular choice with homeowners, but over time, it started to fade out of favor. Many people felt like wallpaper was too difficult to use and even harder to remove, which led to many houses having rooms where the walls were covered in layer upon layer of wallpaper because it was easier to cover it up than to remove it. But wallpaper has improved a lot over the years and is now much easier to work with and easier to take down without damaging your walls. Recently, homeowners have started to take notice of how far wallpaper has come and wallpaper has started to regain popularity again.

Nowadays, wallpaper also comes in a great variety of prints that can add a very stylish look to a room without the hassle of stenciling a pattern onto the wall and painting it yourself (or paying someone else to do it for you.) Modern wallpaper is also available in many different textures, which can be an easy of adding some luxurious-looking touches to your home without having to spend as much money. For example, there are wallpapers that mimic the look of wainscoting and Victorian-era style tin ceiling tiles. As an added bonus, wallpaper tends to be more forgiving if applied on flawed walls, so you won’t have to spend so much time trying to patch up holes and dings like you would if you were painting.

Like the idea of using wallpaper around your home, but don’t want to commit to covering an entire room with it? Start small! Wallpapering one wall of a room as an accent wall is a great way to start, especially if you like a wallpaper with a bold, vibrant print. You could also try experimenting with wallpaper in a small, less frequently used space like a laundry room. Some people even like to use wallpaper on their ceilings!

Wallpaper can also be used in very small areas such as on the backs of cabinets and shelves to add just a little extra visual interest. Do you have a room with crown molding on the walls? You could try applying wallpaper inside that molding so that the molding acts like a frame for the wallpaper. If you have stairs in your home, wallpaper could also be applied to the risers of your stairs. Using wallpaper in any of these ways will help add a pop of color or a nice print to a room without it being overwhelming.

While it’s absolutely possible to wallpaper an entire room and have it look chic and stylish, it seems like the modern trend for wallpaper is to use it in moderation. Wallpaper is definitely not at what it used to be, so if you’re planning on giving some rooms in your house a facelift, a little bit of wallpaper could be just what you’re looking for!

Tips for Organizing Your Basement

Tips for Organizing Your Basement When spring cleaning season comes around, one area of the house many people dread having to deal with is the basement. Since basements are so large and so many things end up being stored there, getting the basement nice and organized can feel like a daunting task. But organizing your basement doesn’t have to be overwhelming. Here are a few ways to help get your basement in order -- and keep it that way!

Get Rid of Clutter

No matter what room you’re working on cleaning, one of the best ways to get organized is to get rid of as much clutter as possible. Is your basement full of boxes of clothes you don’t wear anymore? Bring them on over to the nearest charity that collects clothing. Have a lot of toys your kids have outgrown and no longer play with? Perhaps you could have a garage sale or give them to a friend who has kids who would enjoy them. Once you get rid of the room for things you no longer need or use, you’ll have more room to store the things you actually do need.

Plastic Storage Bins

In addition to being where you store things like out-of-season holiday decorations and old furniture, basements also often end up being home to some of your family’s most treasured possessions like photographs and other mementos. Unfortunately, basements are often prone to flooding. If your basement were to flood, the last thing you’d want is for those cherished, irreplaceable items to be destroyed.

Rather than storing things in cardboard boxes, go for plastic bins instead. That way, they’ll be much better protected in the event of a flood. Be sure to label your storage bins so you’ll be able to easily figure out what each bin contains.  Some people like to even use different colors of storage bins for different things, such as blue bins for holiday decorations and gray ones for photo albums.

Lots of Shelving

Since basements can easily flood, it’s a good idea to store as many things as possible off the basement floor. Even if your basement doesn’t have a history of flooding, it’s still smart to plan ahead. Over 20% of flood insurance claims are made by people who live in places that are considered low-to-moderate flood risk areas. By storing things on shelves, you’ll be protecting your belongings and making it much easier for you to deal with if you ever have to clean up after a flood.

Wire and rivet shelving tend to work very well in basements since they’re strong enough to hold hundreds of pounds worth of weight on each shelf.

Pegboard

In addition to serving as a place for storage or additional livable areas, basements are also often used for things like craft rooms and for storing tools. If you have a craft room or a workbench area in your basement, you know exactly how difficult it can be to keep them organized. Pegboard is perfect for these hard-to-organize areas. The highly versatile nature of pegboard will help you store and organize all those oddly-shaped items that just don’t seem to fit anywhere else. Best of all, pegboard and hooks can easily be found at any hardware store and is very inexpensive. Pegboard can also easily be cut to fit in any sized space and can be painted to match any decor.

Caulking Your Vinyl Windows

Caulking Your Vinyl Windows Is there a room in your house that always seems to be a bit colder (or warmer, if it’s the summertime) than it ought to be? Do you see signs of moisture getting in around your windows when it rains? If so, it might be a good time to check the seals around your window. A good way to find out if you have a draft is to light a candle or incense stick and move it along the edge of a window you think might have a draft. If the smoke or the flame changes direction, you’ve found a draft.

If you have a draft, when was the last time you checked the caulking around your window? Caulking around windows can deteriorate over time and may need to be touched up every now and then. Fortunately, this is the sort of problem you can easily fix on your own without needing to hire a professional or having to pay for new vinyl replacement windows. Here’s how to do it!

Caulking your windows is a pretty simple task and all you need for the job is some caulk, a caulking gun, a wooden stick, and a razor blade, putty knife, or utility knife. Butyl, silicone, and multi-polymer caulks tend to work well around windows and doors.

If the existing caulk around the window only has some small gaps in it, you might be able to simply add a new layer of caulk. But if you’re dealing with larger gaps, you’ll need to remove the old caulk first to start fresh. To remove the old caulk, take your razor blade, putty knife, or utility knife and run it along the existing caulk to help break it up so you can remove it. Just be very careful that you don’t damage the vinyl window frame.

Before you start putting down new caulk, clean your window frame so that the new caulk will have a clean surface to adhere to. Make sure the window frame is completely dry before you start putting down new caulk. Once you’re ready to go, all you have to do is put the tip of the tube of caulk at one end of the edge, pull the trigger on the caulking gun, and move it along the edge until you reach the other end. Let go of the caulking gun’s trigger and set the caulking gun down.

Once you’ve finished caulking one edge, use your wooden stick to even out the caulk line. You can also use your finger if you aren’t able to find a wooden stick. Be sure to use a damp cloth to clean up any caulk that may have gotten on areas you didn’t intend it to get on. Now it’s time to repeat the process on another side of the window. The exact amount of time it will take for your caulk to dry can vary from brand to brand, so make sure you read the manufacturer’s instructions before you get started.

Replacing the caulk on your windows might sound a little intimidating, but as you can see, it’s really very simple. It’s also one of the most effective and least expensive ways to make sure your windows are staying as energy efficient as possible!