Inexpensive Ways to Fix Up a Bathroom

Inexpensive Ways to Fix Up a Bathroom If you were to put your home on the market, the two rooms potential homebuyers are going to be most interested in seeing are the bathroom and the kitchen. Remodeling a bathroom has a reputation for being a great way to add value to your home, but sometimes, you don’t need to take drastic measures to give a bathroom a whole new look and add a little extra value to your home. In fact, there are many very easy and inexpensive ways to make your bathroom a whole new look that don’t involve calling a contractor.
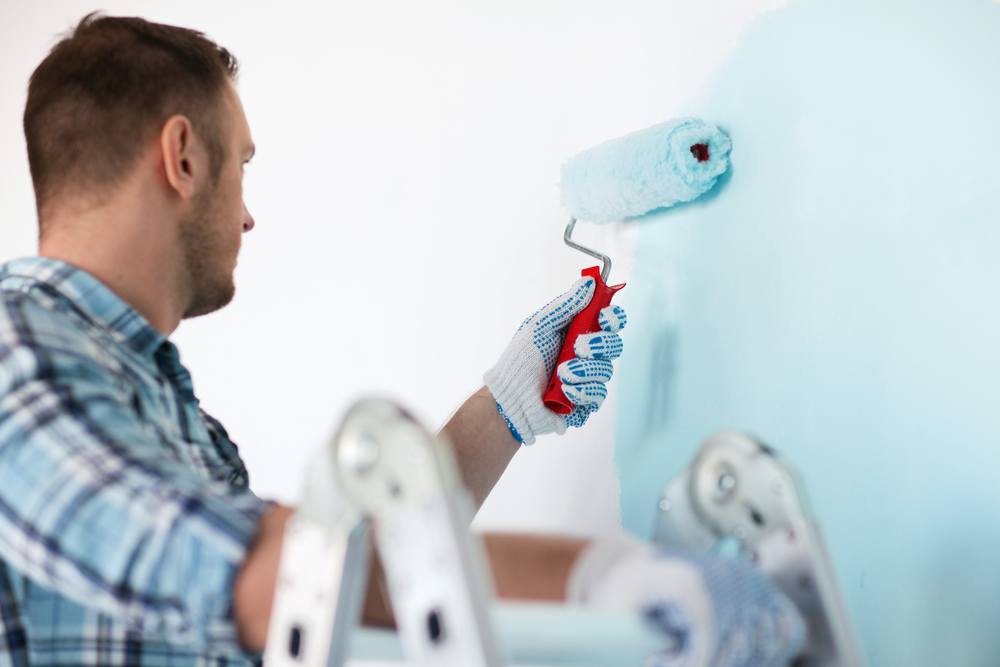
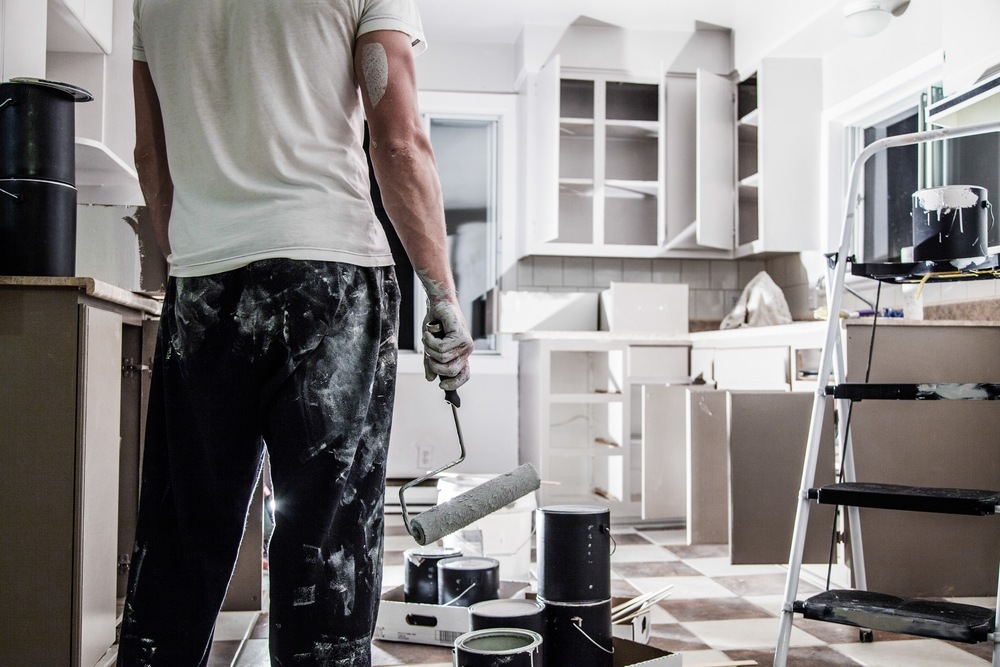
Paint

A can of paint can go a long way in completely changing the way your bathroom looks. For under $50 and a little labor, your bathroom can have a whole new look in just one day. Just be sure to prime your walls with a mildew-resistant primer and choose a paint with a gloss or semigloss finish so that your walls will be easier to clean later on.

You don’t even have to stop at painting the walls. Do you have cabinets or a vanity that could use a little sprucing up? A coat or two of paint can have them looking brand new again!

If you’re not a fan of painting, believe it or not, wallpaper could be an option. There are special types of wallpaper designed to be used in bathrooms which are washable and stand up well to high humidity.

Replace the Fixtures

Worn out or dated-looking fixtures are a surefire way to detract from a bathroom’s look. It doesn’t cost much to replace things like towel racks, light fixtures, door handles on cabinets, or drawer pulls and it hardly takes any effort on your part. If your showerhead or sink’s faucet have seen better days, go ahead and replace those, too. You’ll be amazed at how such simple changes can make such a big difference! And if you replace your faucet or showerhead with environmentally-friendly models, you can have the added benefit of saving on your water bills!

Tile Decals

Ceramic tiles that have a pattern or design on them can add a very stylish touch to a bathroom. But if you already have ceramic tiles on the wall of your shower that are in good shape and you don’t want to go through the hassle of actually replacing any of your tiles, there is an option for you. Tile decals come in a wide variety of patterns and can simply be peeled off and stuck onto your existing tiles. They’re a great way to add some visual interest to your bathroom, but are much more affordable than actually changing out your tiling. As an added bonus, tile decals can be easily removed if you want to change up your look ever again.
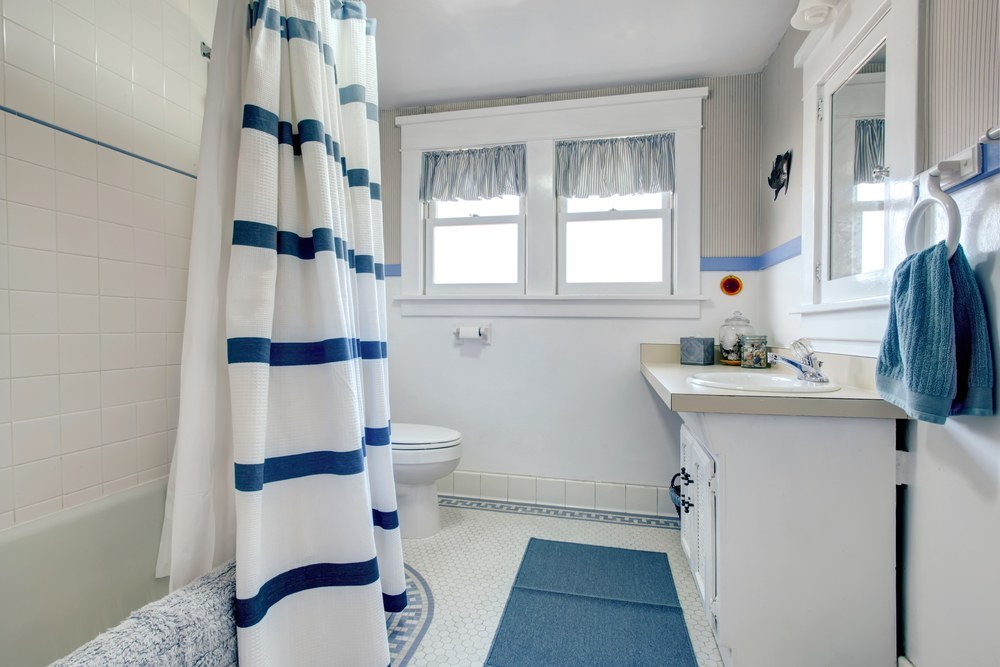
New Shower Curtain

Just like how a fresh coat of paint can really brighten up a bathroom, getting a new shower curtain is another great way to make a big decorative change without spending much money. And it even takes less effort than painting, too! Since there are so many different styles of shower curtains out there, you could find one in a bold pattern or a bright color to serve as an accent to your wall color.

Clean Your Grout

Nothing makes a bathroom old like dirty grout. Some grout cleaners are commercially available, but good old hydrogen peroxide and baking soda make a pretty effective grout cleaner. It can take some time and effort to make sure you get all the grout, but it’s well worth it because clean grout can make your bathroom look brand new again.

Cleaning Blinds Made Easy

Cleaning Blinds Made Easy It goes without saying that blinds are one of the most popular types of window treatments around. They come in a wide variety of colors and styles, can be made to fit any window, so it’s easy to understand their appeal. And hey, they make a great addition to a new set of vinyl replacement windows! Of course, all things have their downsides and the biggest disadvantage to blinds is that they can really be a hassle to clean. With so many small spaces for dust to accumulate in, it can be hard to make sure you get everything.

There’s no need to live with dust-covered blinds when we have some helpful tips for you to keep them clean.

First of all, no matter what type of blinds you have, your vacuum cleaner can be a great tool for helping to keep them clean. If your vacuum has a brush attachment, run it in a downward motion across the slats if you have vertical blinds or run it from left to right if you have horizontal blinds. If you have fabric blinds, make sure the vacuum is set on a low power level. Wood, plastic, and aluminum blinds can withstand a little more power than fabric ones, but it’s best to err on the side of caution and not use the highest power setting on your vacuum.

Vacuuming your blinds every few months or so should help cut down on major dust accumulation, but if vacuuming isn’t enough, there are other options. If you can fit your finger in between the slats of the blinds, cover your hand in an old sock and pinch each blind between your thumb and index finger, and run your fingers across each slat. It’s a great way to pick up dust and put those random lone socks you have laying around to good use at the same time!

For very dirty blinds, using some kind of liquid solution may be necessary. For plastic or aluminum blinds, use a damp sponge to apply a mixture of 50% white vinegar and 50% water. You don’t necessarily have to take them down to do this, just make sure your sponge is damp and not soaking wet. If you have wood blinds, try to avoid using liquid to clean them as much as possible since prolonged contact with a liquid can damage them. Some types of fabric blinds can be taken down and put through the washing machine on a delicate setting. Be sure to find out what your blind’s manufacturer recommends, because dry cleaning may be the best option for some types of materials.

If you prefer to take your blinds down to wash them outside, that’s definitely another option. All you have to do is take them down and lay them down flat outside on a mat. When you’re done cleaning one side, don’t forget to turn them over to get the other side. Once you’re done, rinse them off with a hose, making sure the water pressure isn’t too strong so you don’t damage the blinds.

Avoid These Common Painting Mistakes

Avoid These Common Painting Mistakes For a home improvement project that makes a big impact at a rather low price, it’s hard to beat painting. For the price of a gallon of paint, some brushes, and some drop cloths, you can completely transform a room in a matter of hours or maybe a day or two, depending on the size of the job. Best of all, it’s a pretty simple job to do, too! In most cases, even somebody with no painting experience can easily paint a room themselves without having to hire someone to do it for them.

But just because painting is a pretty simple task, that doesn’t mean there isn’t room for error. There are lots of common mistakes people make while painting a room that can mar an otherwise nice paint job. By avoiding these mistakes, you can make sure your paint job turns out wonderfully and your room will look fantastic afterward!

Not Looking at Paint Samples in the Room’s Light

When you’re trying to choose a new color to paint a room, you go to the hardware or paint store and see samples of thousands of colors available. If you have a specific color in mind, you’ll have hundreds of different shades of that color to choose from and when you finally find the right shade you want, it can be tempting to go right ahead and buy a gallon.

Always take a paint sample home with you to see how it looks in the room you’re planning to paint. Since colors can look a little different depending on the lighting conditions, the shade that looked fantastic in the store under fluorescent lighting might not look as great when it’s on the walls of a room that gets a lot of natural light. For best results, have a small amount of a color you like mixed up at the store and use it to paint a sheet of white paper or poster board. Hang that paper or poster board on the wall and see how it looks throughout the day.

Choosing the Wrong Finish

Once you figure out which color paint you want, you have to choose a finish of your paint. Since the type of finish you choose can have an impact on the price of the paint, you might just want to choose the cheapest option so you can get to work.

The best finish for you depends on the room you’re planning to paint. Gloss and semigloss finishes are the most durable and easiest to clean, so they’re best for kitchens and bathrooms. Satin finishes aren’t as shiny as gloss finishes, but they’re durable enough to stand-up to being used in high-traffic rooms like living rooms, a child’s bedroom, or a hallway. Eggshell finishes are less durable than satins, so they’re great for areas that aren’t as heavily used like dining rooms, but you don’t want a completely flat finish. Flat finishes can chip very easily, but since they absorb light rather than reflect it, it’s the most forgiving if you’re painting a wall that has a lot of flaws. The shinier the finish, the more flaws on the wall it will show, so keep that in mind when choosing your finish.

Buying Cheap Tools

When you’re planning to paint a room, one thing you absolutely don’t want to cut corners on is the quality of tools you use. Good quality brushes and rollers are essential to making sure you get the get the best possible results. They’ll do a much more effective job of applying the paint to the wall evenly and won’t shed bristles throughout the job. It’s perfectly normal for even a high quality paintbrush to shed a few bristles when it’s being used for the first time, but you certainly don’t want to risk have brush bristles getting stuck to your walls and drying in place there.

If you’re going to use tape to create a clean line, don’t use regular masking tape. Painters tape is designed to prevent paint from bleeding through so it will help you get that nice sharp line you’re looking for.

Skipping Proper Prep Work

We know how tempting it can be to just grab your can of paint and get to work, skipping any real prep work beyond covering the floor with a dropcloth. But proper prep work will ensure that all your effort is worthwhile. Always patch up any holes and sand down uneven textures if necessary before starting. Washing your walls first will make sure any dirt, grease, or other debris doesn’t get stuck to the wall. If you’re trying to paint over a surface that already has a coat of gloss or semigloss paint on it, don’t forget to sand it down first or use a deglosser, otherwise you’re going to have a hard time getting new paint to stick.

If you’re painting a surface that’s already been painted, it’s fine to use a paint with a built-in primer as long as you aren’t making too drastic of a color change, such as from a dark red to a pale blue. But priming your walls first will help to ensure your paint looks true-to-color once it’s on your wall.

Painting in Dim Lighting

Painting a room takes a lot of energy. The last thing you want is to go through all that time and effort, only to realize you have to go back and do more work to fix a job that looked fine before, but doesn’t look so great now that you’re seeing it in brighter light. Painting in low light is a recipe for disaster, so make sure you have lots of light to help you see how you’re doing. If a room has lots of windows, try to paint on a sunny day. If the room doesn’t get much natural light, bring in other sources of light to help you out. You’ll be glad you did!

4 Tips for a Green Lawn This Spring

4 Tips for a Green Lawn This Spring Now that spring has officially arrived, it’s time to start getting out there and getting your yard ready for the warmer months ahead. To have a beautiful, green lawn in the spring and summer, there are things you need to do throughout the year to make it look as good as you want it to, including right at the beginning of springtime.

Winter can be a very tough on your lawn and will need a little extra help to look its best. By taking these four steps, you’ll be well on your way to a beautiful lawn this spring and summer!

Rake

If you thought you wouldn’t need your rake again until fall, think again. Raking in the springtime is a very important step in making sure you have the nice, healthy lawn of your dreams in the summer. It’s best to do this once you’re pretty sure you won’t be getting any more snow for the year. By raking in the springtime, you get rid of any leaves you may have missed in the fall, as well as any branches and other debris that may have fallen on your lawn over the winter months. It also helps to fluff up any blades of grass that may have gotten matted down and removes dead blades of grass that could turn into thatch.

Aerate Your Lawn

The soil on your lawn can become compacted over time as people walk around on it, making it more difficult for oxygen and water to get in and help your lawn grow. In colder climates, it’s actually best to do this during the fall, but if you didn’t get around to it then or if you didn’t realize you had a problem with soil compaction.

Check Your Soil’s pH Levels

Few things will stand in your way of a beautiful lawn quite like a soil’s pH level. In fact, if you’ve consistently had a hard time getting a nice lawn, it might not have been your fault. If your soil is too alkaline or too acidic, you will have a very difficult time getting anything to grow. Soil testers can be picked up quite inexpensively at any hardware store and will tell you what your soil’s pH level is in a matter of minutes. If your soil’s pH is 8 or higher, your soil is too alkaline and can be treated with sulfur to bring the pH level down. A soil with a pH level of 5 or lower is too acidic and can be corrected by adding lime to the soil. If you need to add lime or sulfur to the soil, it’s best to do so right before a rainstorm. If you can’t wait for rain, water your lawn for an hour after applying it.

Look Out for Snow Mold

In many cases, all that snow that fell on your lawn during the winter months will melt away without issue once the weather starts to warm up again. But in some cases, you might notice small circles of discolored grass on your lawn, which is known as snow mold. Snow mold can be prevented by raking leaves during the fall and comes in two varieties: gray and pink. Gray snow mold is fairly easy to deal with since it’s a cosmetic issue and typically goes away with regular lawn care as the season progresses. Pink snow mold is more difficult to deal with as it can cause much more damage to the the grass and may require the help of a landscaper to prevent it from coming back.

Making the Most of Your Kitchen Renovation

Making the Most of Your Kitchen Renovation If you’re thinking of selling your home and are looking for some ways to add value to it, spending money on your kitchen is one of the best ways to go. Out of all the rooms in your house, the kitchen is going to be one of the rooms a potential homebuyer will be most interested in. Since the kitchen is one of the most frequently used homes in the house, it’s completely understandable that so many homebuyers put such a high priority on them.

While it’s smart to make improvements to your home to help boost its value and make it more appealing to potential buyers, it’s easy to get carried away and end up getting in over your head with improvements. Before you get started, here are a few important things to keep in mind:

Think Like a Buyer

You don’t necessarily have to go high-end all the way to get the most bang for your buck. Remember, buyers tend to look for homes in a certain neighborhood for a specific reason and very often, it’s because of the price of other homes in the area or because they like other homes in the area. If your home is in a very middle class neighborhood, go for improvements that will appeal to that type of person. A middle class family isn’t going to care about marble countertops; they’d much rather have something like granite countertops, which look very nice, are less expensive, and easy to take care of. Or if you have a window in your kitchen that has seen better days, a new vinyl replacement window would be something a homebuyer would definitely like to see.

Go for Quality

Although it’s important to not go overboard on your kitchen renovations, that doesn’t necessarily mean you should go for the cheapest possible options, either. People still want to see things that are of decent quality. No homebuyer is going to be excited about seeing particleboard, cheap-looking handles on the drawers, and hinges that don’t hold cupboard doors all the way shut. There are always ways to get a nice level of quality without going for the most expensive option available.

Design to Appeal to a Broad Audience

When you’re renovating your kitchen ahead of selling it, now is not the time to start decorating to suit your own personal style. You’ll want your kitchen to appeal to lots of different people. Think neutral colors, mid-range improvements, and a simple design scheme. Go ahead and check out home decor and home improvement magazines and websites to get some ideas of what trends are currently popular. You may even want to talk to a real estate agent about what sorts of features homebuyers want in kitchens right now.