Blog

Wallpaper is Making a Comeback!

Wallpaper is Making a Comeback Decades ago, wallpaper was a very popular choice with homeowners, but over time, it started to fade out of favor. Many people felt like wallpaper was too difficult to use and even harder to remove, which led to many houses having rooms where the walls were covered in layer upon layer of wallpaper because it was easier to cover it up than to remove it. But wallpaper has improved a lot over the years and is now much easier to work with and easier to take down without damaging your walls. Recently, homeowners have started to take notice of how far wallpaper has come and wallpaper has started to regain popularity again.

Nowadays, wallpaper also comes in a great variety of prints that can add a very stylish look to a room without the hassle of stenciling a pattern onto the wall and painting it yourself (or paying someone else to do it for you.) Modern wallpaper is also available in many different textures, which can be an easy of adding some luxurious-looking touches to your home without having to spend as much money. For example, there are wallpapers that mimic the look of wainscoting and Victorian-era style tin ceiling tiles. As an added bonus, wallpaper tends to be more forgiving if applied on flawed walls, so you won’t have to spend so much time trying to patch up holes and dings like you would if you were painting.

Like the idea of using wallpaper around your home, but don’t want to commit to covering an entire room with it? Start small! Wallpapering one wall of a room as an accent wall is a great way to start, especially if you like a wallpaper with a bold, vibrant print. You could also try experimenting with wallpaper in a small, less frequently used space like a laundry room. Some people even like to use wallpaper on their ceilings!

Wallpaper can also be used in very small areas such as on the backs of cabinets and shelves to add just a little extra visual interest. Do you have a room with crown molding on the walls? You could try applying wallpaper inside that molding so that the molding acts like a frame for the wallpaper. If you have stairs in your home, wallpaper could also be applied to the risers of your stairs. Using wallpaper in any of these ways will help add a pop of color or a nice print to a room without it being overwhelming.

While it’s absolutely possible to wallpaper an entire room and have it look chic and stylish, it seems like the modern trend for wallpaper is to use it in moderation. Wallpaper is definitely not at what it used to be, so if you’re planning on giving some rooms in your house a facelift, a little bit of wallpaper could be just what you’re looking for!

Tips for Organizing Your Basement

Tips for Organizing Your Basement When spring cleaning season comes around, one area of the house many people dread having to deal with is the basement. Since basements are so large and so many things end up being stored there, getting the basement nice and organized can feel like a daunting task. But organizing your basement doesn’t have to be overwhelming. Here are a few ways to help get your basement in order -- and keep it that way!

Get Rid of Clutter

No matter what room you’re working on cleaning, one of the best ways to get organized is to get rid of as much clutter as possible. Is your basement full of boxes of clothes you don’t wear anymore? Bring them on over to the nearest charity that collects clothing. Have a lot of toys your kids have outgrown and no longer play with? Perhaps you could have a garage sale or give them to a friend who has kids who would enjoy them. Once you get rid of the room for things you no longer need or use, you’ll have more room to store the things you actually do need.

Plastic Storage Bins

In addition to being where you store things like out-of-season holiday decorations and old furniture, basements also often end up being home to some of your family’s most treasured possessions like photographs and other mementos. Unfortunately, basements are often prone to flooding. If your basement were to flood, the last thing you’d want is for those cherished, irreplaceable items to be destroyed.

Rather than storing things in cardboard boxes, go for plastic bins instead. That way, they’ll be much better protected in the event of a flood. Be sure to label your storage bins so you’ll be able to easily figure out what each bin contains.  Some people like to even use different colors of storage bins for different things, such as blue bins for holiday decorations and gray ones for photo albums.

Lots of Shelving

Since basements can easily flood, it’s a good idea to store as many things as possible off the basement floor. Even if your basement doesn’t have a history of flooding, it’s still smart to plan ahead. Over 20% of flood insurance claims are made by people who live in places that are considered low-to-moderate flood risk areas. By storing things on shelves, you’ll be protecting your belongings and making it much easier for you to deal with if you ever have to clean up after a flood.

Wire and rivet shelving tend to work very well in basements since they’re strong enough to hold hundreds of pounds worth of weight on each shelf.

Pegboard

In addition to serving as a place for storage or additional livable areas, basements are also often used for things like craft rooms and for storing tools. If you have a craft room or a workbench area in your basement, you know exactly how difficult it can be to keep them organized. Pegboard is perfect for these hard-to-organize areas. The highly versatile nature of pegboard will help you store and organize all those oddly-shaped items that just don’t seem to fit anywhere else. Best of all, pegboard and hooks can easily be found at any hardware store and is very inexpensive. Pegboard can also easily be cut to fit in any sized space and can be painted to match any decor.

Caulking Your Vinyl Windows

Caulking Your Vinyl Windows Is there a room in your house that always seems to be a bit colder (or warmer, if it’s the summertime) than it ought to be? Do you see signs of moisture getting in around your windows when it rains? If so, it might be a good time to check the seals around your window. A good way to find out if you have a draft is to light a candle or incense stick and move it along the edge of a window you think might have a draft. If the smoke or the flame changes direction, you’ve found a draft.

If you have a draft, when was the last time you checked the caulking around your window? Caulking around windows can deteriorate over time and may need to be touched up every now and then. Fortunately, this is the sort of problem you can easily fix on your own without needing to hire a professional or having to pay for new vinyl replacement windows. Here’s how to do it!

Caulking your windows is a pretty simple task and all you need for the job is some caulk, a caulking gun, a wooden stick, and a razor blade, putty knife, or utility knife. Butyl, silicone, and multi-polymer caulks tend to work well around windows and doors.

If the existing caulk around the window only has some small gaps in it, you might be able to simply add a new layer of caulk. But if you’re dealing with larger gaps, you’ll need to remove the old caulk first to start fresh. To remove the old caulk, take your razor blade, putty knife, or utility knife and run it along the existing caulk to help break it up so you can remove it. Just be very careful that you don’t damage the vinyl window frame.

Before you start putting down new caulk, clean your window frame so that the new caulk will have a clean surface to adhere to. Make sure the window frame is completely dry before you start putting down new caulk. Once you’re ready to go, all you have to do is put the tip of the tube of caulk at one end of the edge, pull the trigger on the caulking gun, and move it along the edge until you reach the other end. Let go of the caulking gun’s trigger and set the caulking gun down.

Once you’ve finished caulking one edge, use your wooden stick to even out the caulk line. You can also use your finger if you aren’t able to find a wooden stick. Be sure to use a damp cloth to clean up any caulk that may have gotten on areas you didn’t intend it to get on. Now it’s time to repeat the process on another side of the window. The exact amount of time it will take for your caulk to dry can vary from brand to brand, so make sure you read the manufacturer’s instructions before you get started.

Replacing the caulk on your windows might sound a little intimidating, but as you can see, it’s really very simple. It’s also one of the most effective and least expensive ways to make sure your windows are staying as energy efficient as possible!

Avoid These Common Home Renovation Mistakes

Avoid These Home Renovation Mistakes Finally being able to start a home renovation project you’ve always dreamed of being able to do can be very exciting. Unfortunately, it’s very easy for these projects to spiral out of control. Since these aren’t projects most homeowners do very often, many homeowners end up making mistakes along the way that end up making renovations a lot more stressful and expensive. Learn from their mistakes and avoid these common errors:

Don’t Rush Into Things

A good home renovation project takes a lot of thorough planning. You’ll want to take time to plan out exactly what you want to get out of the project, find a great contractor, decide what types of materials you want to use, and so much more. Jumping into a project without taking the time to plan things out first often ends in frustration for everybody involved. If you change your mind about something once work has begun, even if it seems like a simple change, it might end up costing you extra money and cause extra work for the contractor.

Don’t Hire the First Contractor You Talk To

Talking to several different contractors takes time, but it’s time very well spent. Not all contractors will approach a job in the exact same way, so you’ll definitely want to get estimates from a few different contractors before making a final decision. Take the time to check references, look up reviews from past customers, and make sure they really are licensed and insured. By taking the time to get a few different quotes and do your homework, you’ll be making sure you hire the right contractor for the job.

Don’t Pick the Cheapest Options

There are many times in life where it’s perfectly fine to save some money and go with the least expensive option possible. Home renovations are not one of those things.  When it comes to home repairs, going with the cheapest possible route often ends up costing more in the long run.

Remember, there’s a fine line between “inexpensive” and “cheap” and sometimes it’s worth paying a little bit more. If you get a quote from a contractor that’s considerably lower than some of the others you got, there might be a very good reason for that: the contractor might not be licensed or insured, their bid might exclude something important like trash removal, they might not have a lot of experience, they might do shoddy work, or they might use low-quality building supplies.

Don’t Skip the Permits

Not all household repairs and renovations will require permits from your city, but if they’re required, don’t try to skip them and hope that nobody will notice. Ultimately, building permits exist to help protect you and your home. If someone finds out that you had work done on your home without getting a permit, they might report you and the city could force you to remove the work, which means you’d have to pay to have the job done all over again. Even if you go several years without anyone knowing you’ve had un-permitted work done on your home, it could be uncovered during an inspection when you decide to sell your home, which would require you to fix the problem before the home can be sold.

Spending a little extra time on your home renovation projects often pays off in spades. By learning from other homeowners’ mistakes, you’ll be well on your way to keeping your home renovation projects on track.

Building an Addition vs. Buying a New Home

Building an Addition vs. Buying a New Home When you first moved into your home, you probably felt like you had plenty of room. But now that you’ve lived there for a while, maybe your home isn’t quite as comfortable as it used to be. Perhaps your home was perfectly fine when it was just you and your spouse, but now it’s starting to get awfully crowded now that you have kids to think of.

After a certain point, your home can simply be too small and no amount of clever storage tricks are going to be able to help. If your home has truly reached maximum capacity, there are two ways you can solve the problem: you could move to a larger home or you could build an addition on your current house.

If you’ve lived in your home for a long time, you’re probably very fond of the location and your neighbors and you might not necessarily want to have to give them up to move to a new home. Moving to a new home isn’t always the best option if you live in an area where property values are on the rise. If property values have gone up significantly in your area, the real estate market is likely very competitive, which can make it extremely difficult to find another home in your area that you can afford.

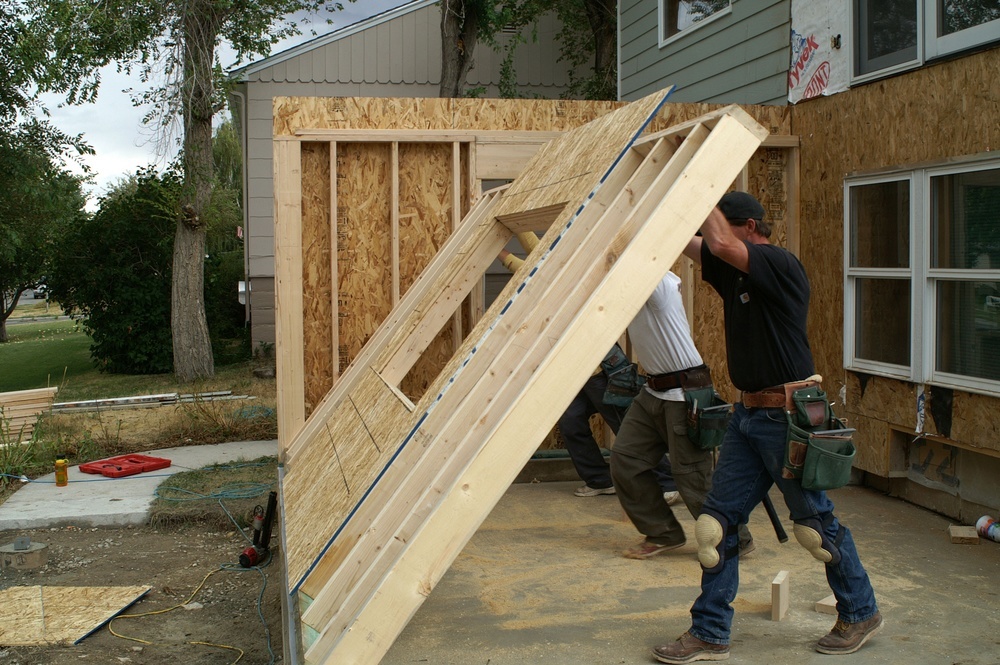
When moving isn’t ideal, building an addition on your home might be a better option. The cost of a home addition depends on what kind of addition you’re interested in. Second story additions are pretty complex and can easily cost over $100,000, making them one of the most expensive home improvement projects you can undertake. Having an extra room or two added onto the ground level of the home is a lot less complicated, but many cities have building codes that regulate things like how close your home can be to property lines, so it’s entirely possible that building your home upward might be your only option.

However, adding on to your home can make a huge impact on the rest of your home in more ways than you may realize. Not only will it make a difference in how your home looks from the outside, you may also have to upgrade your home’s HVAC and electrical systems to be able to power and heat the space being created. If you’re adding a second story, an engineer will have to make sure your home is structurally sound enough to support the added weight and you’ll have to add a staircase, which will take up some floor space on the lower level. If the new part of your home has new vinyl windows and the windows in the rest of your home are older, you might want to have new vinyl replacement windows installed in the rest of your home to match the new part of your home.

Another very important thing to keep in mind before building an addition to your home is that it may impact the taxes you’ll have to pay on your home. You’ll also want to be sure that your addition won’t end up working against you if you later decide to sell your home. To get the most value out of home renovations, it’s important to be careful to not over-improve and make your home significantly more expensive or stand out too much from the other homes in your neighborhood. A home with a second story might stand out too much if the other homes in the neighborhood are all single stories.

Buying a new home and building an addition to your home are both ways to get the extra space you need. Neither option is necessarily better than the other and they both involve a good amount of upheaval on your part, so it’s very important to understand the pros and cons of both options.